
Breast Augmentation Cost New York: A Complete 2026 Guide
Learn about breast augmentation cost New York in 2026, including surgeon fees, facility charges, and financing options to help plan your procedure.
Mar 14, 2026

Believe it or not, your journey to a barely-there scar doesn't start after your surgery—it begins weeks beforehand. The groundwork for beautiful healing is laid well before you even step into the operating room.
Think of it as preparing the soil before you plant a precious flower. By creating a healthy, supportive environment inside your body, you’re giving your skin the very best chance to heal cleanly and create a scar that’s as faint as possible.

From my years of experience, I can tell you that the choices you make before your procedure have a profound impact on the final result. It’s all about setting your body up for success. This pre-operative phase focuses on three key areas: choosing the right surgeon, fueling your body with the right nutrients, and making crucial lifestyle adjustments.
Without a doubt, the single biggest influence on your future scar is the surgeon’s technique. A board-certified plastic surgeon doesn’t just think about the procedure; we’re already planning for the scar from the moment we map out the first incision.
It’s an art and a science. We use our deep knowledge of skin anatomy to place incisions along natural skin folds and tension lines (often called Langer’s lines). It's a fundamental principle for us because a well-placed incision just heals better. Clinical evidence shows scars can fade up to 50% better when they aren't fighting against your skin's natural tension. This is especially important as we see more people choosing these procedures—the American Society of Plastic Surgeons noted a 19% jump in cosmetic and reconstructive surgeries from 2019 to 2022, totaling 26.2 million procedures.
A surgeon’s technique is the foundation for everything that follows. A well-planned incision, aligned with your skin’s natural folds and closed in precise layers to minimize tension, is the platform on which all your other scar care efforts are built.
Tension is the enemy of a minimal scar. Incisions closed under high tension can trigger an overproduction of collagen, leading to thick, raised scars in as many as 70% of cases. Minimizing that tension from the start is our top priority.
Your body is an incredible healing machine, but it needs the right fuel to do its job. The weeks leading up to your surgery are the perfect time to double down on nutrition that supports tissue repair and keeps inflammation in check.
Here’s what to focus on:
Just as important is what you stop doing. Smoking is particularly destructive to the healing process. Nicotine constricts your blood vessels, effectively starving the delicate, healing skin of the oxygen and nutrients it desperately needs. Kicking the habit at least four to six weeks before surgery is one of the most powerful things you can do for your future scar.
For a more detailed checklist, be sure to review our complete guide on how to prepare for surgery.
The moment your surgery is over, a new journey begins: the healing process. That first month is without a doubt the most important phase for your incision. I always tell my patients to think of that new incision line as incredibly fragile, brand-new skin. What you do—and don't do—during these initial weeks has a massive impact on how that scar will mature over the coming years. This is your time to be patient and protect your investment.
Our goals are straightforward but non-negotiable. We need to prevent any hint of infection, shield the incision from being pulled or stretched, and give the tissue the perfect, undisturbed environment to knit itself back together. While every person heals at their own pace, these core principles are universal.
Right after your procedure, Dr. Fater will have covered your incision with sterile dressings or surgical tape. It is absolutely essential to follow the specific instructions our team gives you. These aren't just general suggestions; they are customized for your surgery and are your first line of defense against complications.
Your only job during this time is to keep the area clean and dry. We’ll give you precise directions on when and how to gently wash the site, which usually just involves a little mild soap and carefully patting it dry. Never, ever rub it. It's also critical to keep the incision out of standing water, so that means no baths, swimming, or hopping in the hot tub until we give you the green light.
A Word of Caution: Please don't apply any creams, oils, or "miracle" scar remedies you found online to your healing incision. Following the plan our team has laid out is the safest path forward. Introducing outside products at this stage can easily cause irritation or interfere with the healing process.
Another huge focus is keeping tension off the incision line. You’d be surprised how everyday movements can pull on a fresh incision and cause the final scar to widen. Be very mindful of how you bend, lift, or twist. For instance, if you’ve had a tummy tuck, something as simple as a cough can put a lot of strain on that line. A great tip is to hold a firm pillow against your abdomen to brace it before you cough or sneeze—it makes a world of difference.
For a deeper dive into managing your wound in these early days, our guide on how to care for surgical incisions covers this topic in great detail.
Once you’re a few weeks out from surgery, you'll start to see a real change. The incision line will be closed, and any scabs will have fallen off on their own. As soon as you have a fully closed incision—and only after you get the explicit go-ahead from Dr. Fater—we can shift from basic wound care to actively managing the scar itself.
This is when we introduce the gold standard for minimizing surgical scars: silicone therapy.
Available as either a gel or thin, flexible sheets, silicone is the most proven topical treatment we have. It works in a beautifully simple way by creating a protective, breathable barrier over the new scar. This accomplishes two crucial things:
Here at the practice, we typically have patients start silicone therapy around the three-week mark, but that timeline is entirely based on how your individual incision is healing.
Once you start, the key is consistency. You’ll apply the gel or sheet and wear it for as many hours a day as you can, building up to 24-hour coverage if possible. This is a marathon, not a sprint. Think of it as a daily commitment that will pay dividends for months, guiding your scar to become the faint, flat line you’re hoping for.
Once your incision has completely closed up and I've given you the green light at your follow-up appointment, it’s time to begin the single most important part of your at-home scar care: silicone therapy. There's a reason plastic surgeons everywhere consider this our go-to treatment. It's a simple, non-invasive, and evidence-backed method that helps guide your body to create the faintest, flattest, and most discreet scar possible.
So, how does a simple gel or sheet work such magic? It creates a special micro-environment right on top of your scar. By forming an ultra-thin, breathable barrier, silicone locks in the perfect amount of moisture. This is a process we call occlusive hydration.
That stable, hydrated environment sends a critical signal to your healing skin, essentially telling it to relax. It helps stop the over-production of collagen that can lead to thick, discolored, or ropey scars. Instead, the new collagen fibers are encouraged to form in a much more organized, flat pattern, which dramatically improves the final cosmetic result.
This is a crucial step that begins only after your incision has fully healed, transitioning you from basic wound care to active scar management.

One of the first questions my patients ask is whether they should use a silicone gel or a sheet. Honestly, both are fantastic options. The right choice for you usually just depends on the scar’s location and your daily routine.
Silicone Gels: These are my top pick for scars in highly visible or mobile spots, like your face, neck, or over a joint. The gel dries into a perfectly clear, flexible film that you can’t even see. Best of all, once it’s dry, you can apply sunscreen or even makeup right over the top. It offers great results with total discretion.
Silicone Sheets: These are excellent for scars on flatter parts of the body, such as after a tummy tuck or breast augmentation. The sheets provide a bit of gentle, consistent pressure along with the hydration. They’re also typically reusable, which makes them a very cost-effective option for the months of therapy ahead. They stay put perfectly under clothing.
No matter which one you choose, the application is incredibly simple. Just make sure the scar is clean and completely dry, then apply a very thin layer of the gel or place the sheet directly over the incision. The key is to keep the silicone in contact with the scar for as many hours a day as you can manage.
This is where your dedication really makes a difference. Silicone therapy isn’t a quick fix—it’s a long-term strategy that requires real patience. For the best outcome, you need to use your silicone product for at least 12 hours a day. If your lifestyle allows, aiming for 24-hour coverage is even better.
To get the most out of your silicone therapy, it’s helpful to follow a structured timeline. Here’s a typical schedule we recommend to our patients to ensure they are consistent and get the best possible results.
This consistent, long-term approach is what allows the silicone to work its magic, gradually improving the texture and color of your scar over time.
The data backs this up without a doubt. Consistent use of silicone for 12 to 24 weeks has been shown to reduce scar thickness by 86%, improve raised texture by 62%, and even out discoloration by 68%.
These products are valued because they are easy to use, affordable, and incredibly effective—which is why the industry is projected to become a $32.29 billion market by 2026, with silicone therapies making up 65% of it. They prevent the excessive collagen growth that can affect up to 70% of patients who are looking for better scar outcomes. If you're interested in the science, you can read more about the full findings from clinical trials.
After the first few weeks, your wound care shifts gears. The initial healing is done, and now we enter the "remodeling" phase. This is where you can have the most impact on what your scar will ultimately look like.
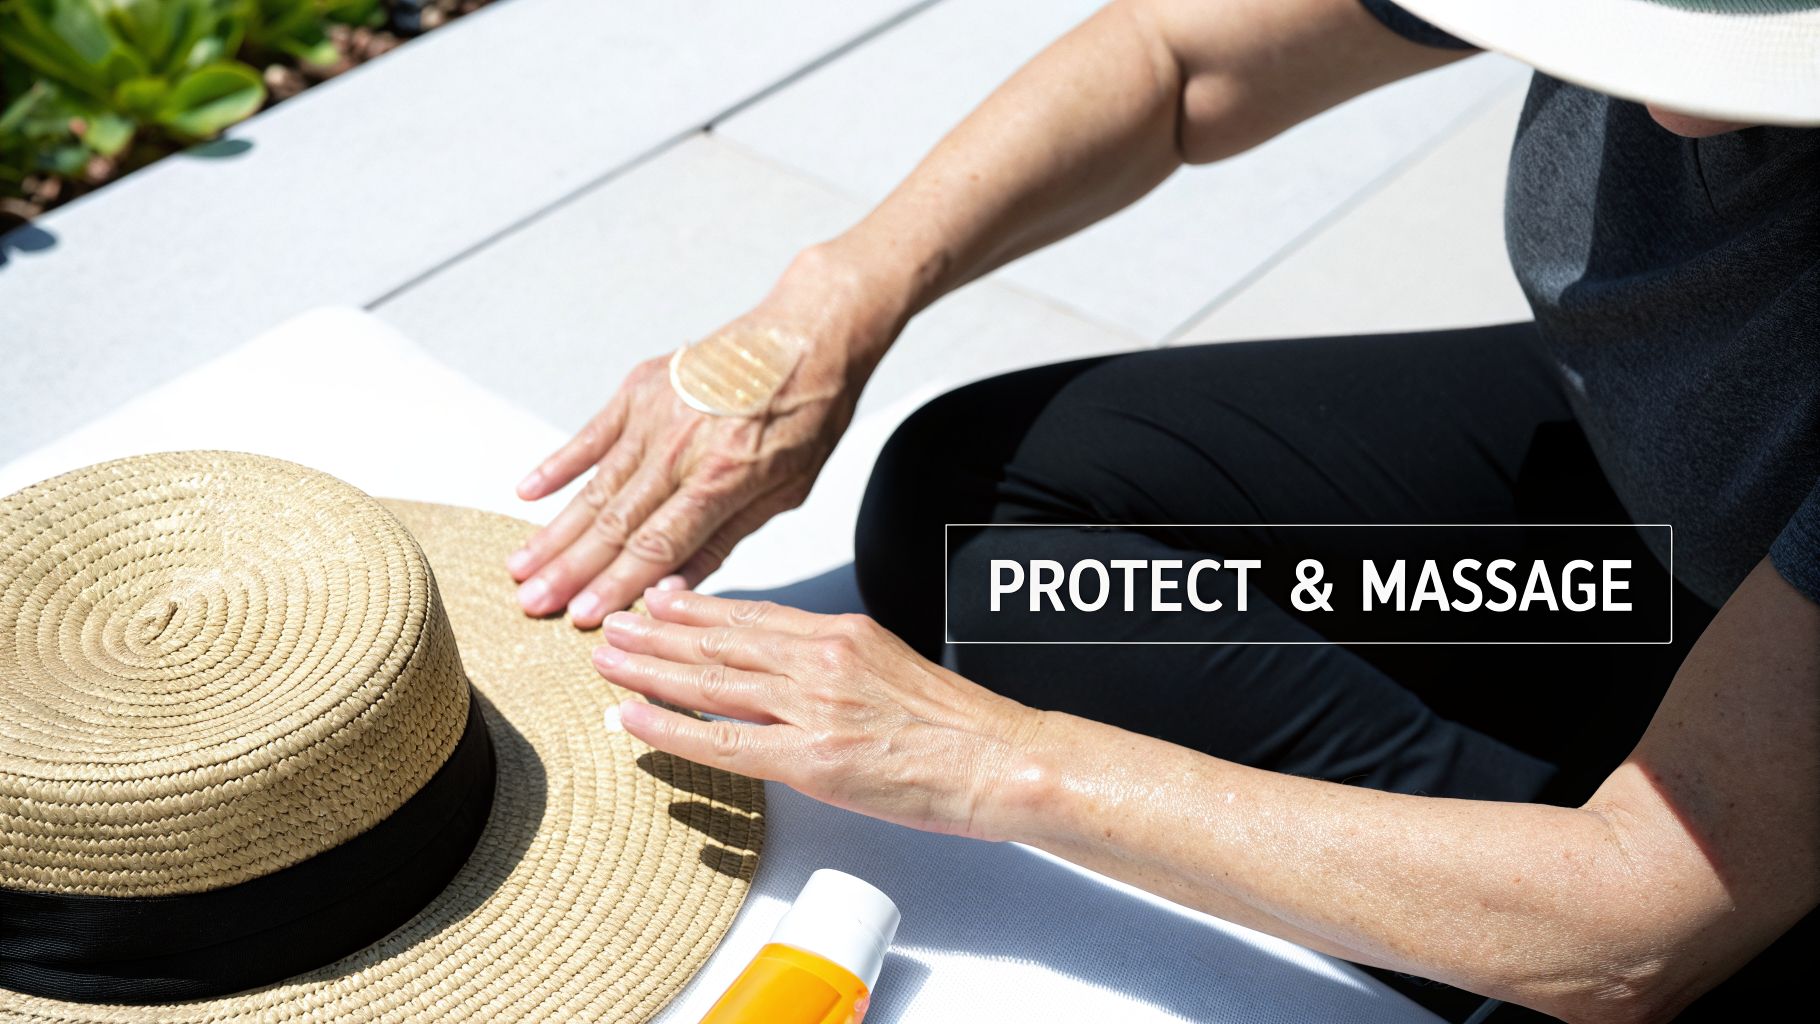
This stage can last for a year or even longer, and it’s all about actively managing the new tissue. Two powerful techniques are at the heart of this process: protecting your scar from the sun and strategic massage.
New scar tissue is delicate and has no natural defense against the sun. It lacks the mature, pigment-producing cells (melanocytes) that protect the rest of your skin. Exposing a fresh scar to UV rays can trigger an inflammatory reaction that leads to post-inflammatory hyperpigmentation (PIH)—a permanent darkening that makes the scar much more visible.
Living here on Cape Cod, we know how hard it is to avoid the sun, but this is a critical rule for the first year after your surgery. Your scar needs to be completely shielded.
Think of your new scar as a baby’s skin—it has zero defense against the sun. Even incidental exposure, like the light that comes through your car window while driving, is enough to cause permanent discoloration.
Here’s your game plan for sun defense:
Massage is your hands-on tool for reshaping scar tissue from the outside in. We’ll tell you exactly when to start, but it’s usually around the 3 to 4-week mark, once the incision is fully closed and strong.
The purpose is to break down the firm collagen bundles that can make a scar feel raised, tight, or stuck to the tissues below. It also improves blood flow, which nourishes the area and helps the remodeling process along.
Here’s how to do it right:
Consistency is everything. This daily ritual, paired with diligent sun protection and your silicone therapy, gives you real control over your healing. You’re actively encouraging the tissue to become a soft, flat, and faint line, which is exactly the result we’re all working toward.
You've been diligent with your silicone sheets and massage, and that's the absolute cornerstone of getting a great result. But sometimes, even with perfect care, a scar can be stubborn. If a few months have passed and your scar still feels thick, looks raised, or remains intensely red, it’s not because you did anything wrong. It’s simply how your body decided to heal.
This is the point where we can step in with more advanced treatments. If your scar feels firm to the touch, hasn't flattened out, or is still uncomfortably itchy or tender despite your best efforts at home, it’s time to let us know. These are classic signs that your body is in collagen-overdrive, and we have ways to get that healing process back on track.
For those distinctly raised and firm scars, which we call hypertrophic, one of our most direct and effective tools is a series of targeted steroid injections. We often turn to this treatment right here in the office because it tackles the problem at its source.
We inject a tiny, controlled dose of a corticosteroid medication directly into the dense scar tissue. This does two things: it acts as a powerful anti-inflammatory, telling your body to dial back its collagen production, and it helps soften the tough collagen fibers that have already formed.
My patients are often surprised by how much relief they feel after just one or two sessions. The injections not only work to flatten the scar over a series of treatments but also significantly reduce the persistent itching and tenderness that often accompany these types of scars.
These injections are typically done in our office every four to six weeks. How many you'll need really depends on the scar’s thickness and how it responds, but it’s a fantastic way to manage scars that just won’t budge with topical care alone.
Lasers have completely changed how we manage scars, allowing us to fine-tune treatments for specific issues like redness or texture with very little downtime. We can now pick the right tool for the exact problem your scar presents.
If a scar is stubbornly red or purple, we can use a vascular laser (like a Pulsed Dye Laser) to target the tiny blood vessels causing the discoloration. This dramatically reduces the redness, helping the scar blend in. For texture problems, fractional lasers are the real workhorses.
Fractional CO2 lasers, in particular, have been a breakthrough for post-surgical scars. The entire scar treatment market is projected to hit $56.3 billion by 2033, largely because patients are seeking out effective, minimally invasive options like these. Here in North America, which holds 38% of the market, these lasers are a go-to for hypertrophic scars. Studies show they can:
All of this is achieved with less than a week of downtime, showcasing the amazing growth of the scar treatment market.
If you’re weighing different options, our guide comparing microneedling vs. laser treatment can offer some clarity. For more significant issues, highly specialized treatments like Scar Revision Aerolase show just how precise these tools can be. The best first step is always a conversation with us to figure out the right path forward for your specific needs.
No matter how thoroughly we go over your recovery plan before surgery, questions are bound to come up once you’re home and healing. That’s completely normal. Feeling confident during your recovery is so important, and having answers to the most common concerns can make all the difference.
Let’s walk through some of the questions we hear most often from our patients here at Cape Cod Plastic Surgery. Knowing what’s normal and what isn’t will help you take an active role in getting the beautiful result you deserve.
This is, without a doubt, one of the most frequent questions we get. The timing for both is absolutely critical. Starting too soon can actually set your healing back, so let's get the timeline straight.
You can typically begin using silicone-based scar treatments once your incision is fully healed over, meaning there are no scabs left at all. For most patients, this happens around the 2 to 4-week mark post-op. But remember, this is just a guideline. You must wait for your surgeon to personally examine the incision and give you the green light at your follow-up appointment.
Exercise is a different story. We encourage you to start gentle walking right away to keep your circulation healthy. However, more strenuous exercise is strictly off-limits for at least 4 to 6 weeks. Any activity that pulls or puts tension on your new scar—think heavy lifting after a tummy tuck or certain yoga poses after a breast augmentation—is a major no-go. It can literally stretch the scar, making it wider and more noticeable.
It's easy to see a raised scar and worry, but understanding what kind of scar you might have is key, as it completely changes our treatment approach. While both hypertrophic scars and keloids are raised, they behave very differently.
Hypertrophic Scars: These are raised and can be reddish and itchy, but they are predictable. A hypertrophic scar will always stay within the original boundaries of the surgical incision. They tend to improve a great deal on their own over a year or two and usually respond very well to at-home care like silicone sheeting and massage.
Keloid Scars: Keloids are far more aggressive. A keloid doesn't respect boundaries; it grows beyond the edges of the initial wound and invades the healthy skin around it. Keloids can be painful, intensely itchy, and may continue to grow over time. They also have a frustratingly high rate of coming back, even after treatment.
You can think of a hypertrophic scar as being a bit overgrown but contained within its garden plot. A keloid, on the other hand, is like an invasive vine that starts spreading across the entire lawn. This is precisely why you need a professional diagnosis to guide your care.
Because keloids are so persistent, they almost always require more intensive medical intervention. This often involves a series of steroid injections, cryotherapy (freezing), or specialized laser treatments. Simply trying to manage a true keloid at home is rarely enough.
We get this question all the time, and it’s an important one that deserves a direct, honest answer. Anytime an incision is made through the full thickness of the skin, some kind of permanent mark will be left behind. It’s biologically impossible for a scar to simply vanish.
Our goal with any scar care plan isn’t to make the scar disappear, but to make it inconspicuous. Through meticulous surgical technique and your diligent post-op care, the aim is to create a final scar that is just a fine, flat, pale line that blends right into your skin. If you stick with the plan for the full maturation period—which can be up to 18 months—you can absolutely achieve a result that is so faint it becomes a non-issue in your daily life.
Knowing how to care for your scar is half the battle; the other half is knowing when to call for help. Normal healing involves some redness, mild swelling, and tenderness that slowly gets better over time. Anything that seems to be getting worse instead of better is a reason to check in.
You need to contact our office immediately if you notice any potential signs of infection. These are not "wait-and-see" issues and require prompt medical attention.
Signs of Infection:
Other warning signs to watch for are severe, persistent itching or pain that doesn't seem to be improving. If a scar continues to get harder, thicker, and more raised several months after surgery, or if it starts growing beyond the original incision line (a telltale sign of a keloid), that’s your cue to call us. Catching these things early is always the best way to get your healing back on track.
At Cape Cod Plastic Surgery, our commitment to your results extends far beyond the operating room. If you have questions about your healing or want to explore your options for achieving the best possible outcome, we are here to guide you. Contact us today to schedule your consultation and start your journey with confidence.
Learn about breast augmentation cost New York in 2026, including surgeon fees, facility charges, and financing options to help plan your procedure.

July 28, 2026
Compare breast augmentation before and after pregnancy with expert guidance on timing, breastfeeding safety, implant choices, and realistic results.

July 27, 2026
Learn evidence-based capsular contracture prevention strategies, from surgical technique and implant choice to aftercare and early warning signs.
Cape Cod Plastic Surgery offers expert cosmetic and reconstructive procedures in a safe, accredited setting. Led by Dr. Marc Fater, we combine advanced techniques with personalized care to help you look and feel your best.
Monday: 9:00 AM – 5:00 PM
Tuesday: 9:00 AM – 5:00 PM
Wednesday: 9:00 AM – 5:00 PM
Thursday: 9:00 AM – 5:00 PM
Friday: 9:00 AM – 5:00 PM