

October 7, 2026
What to Expect During Your Breast Surgery Recovery
A Practical Guide to Healing After Breast Surgery
Jul 23, 2026
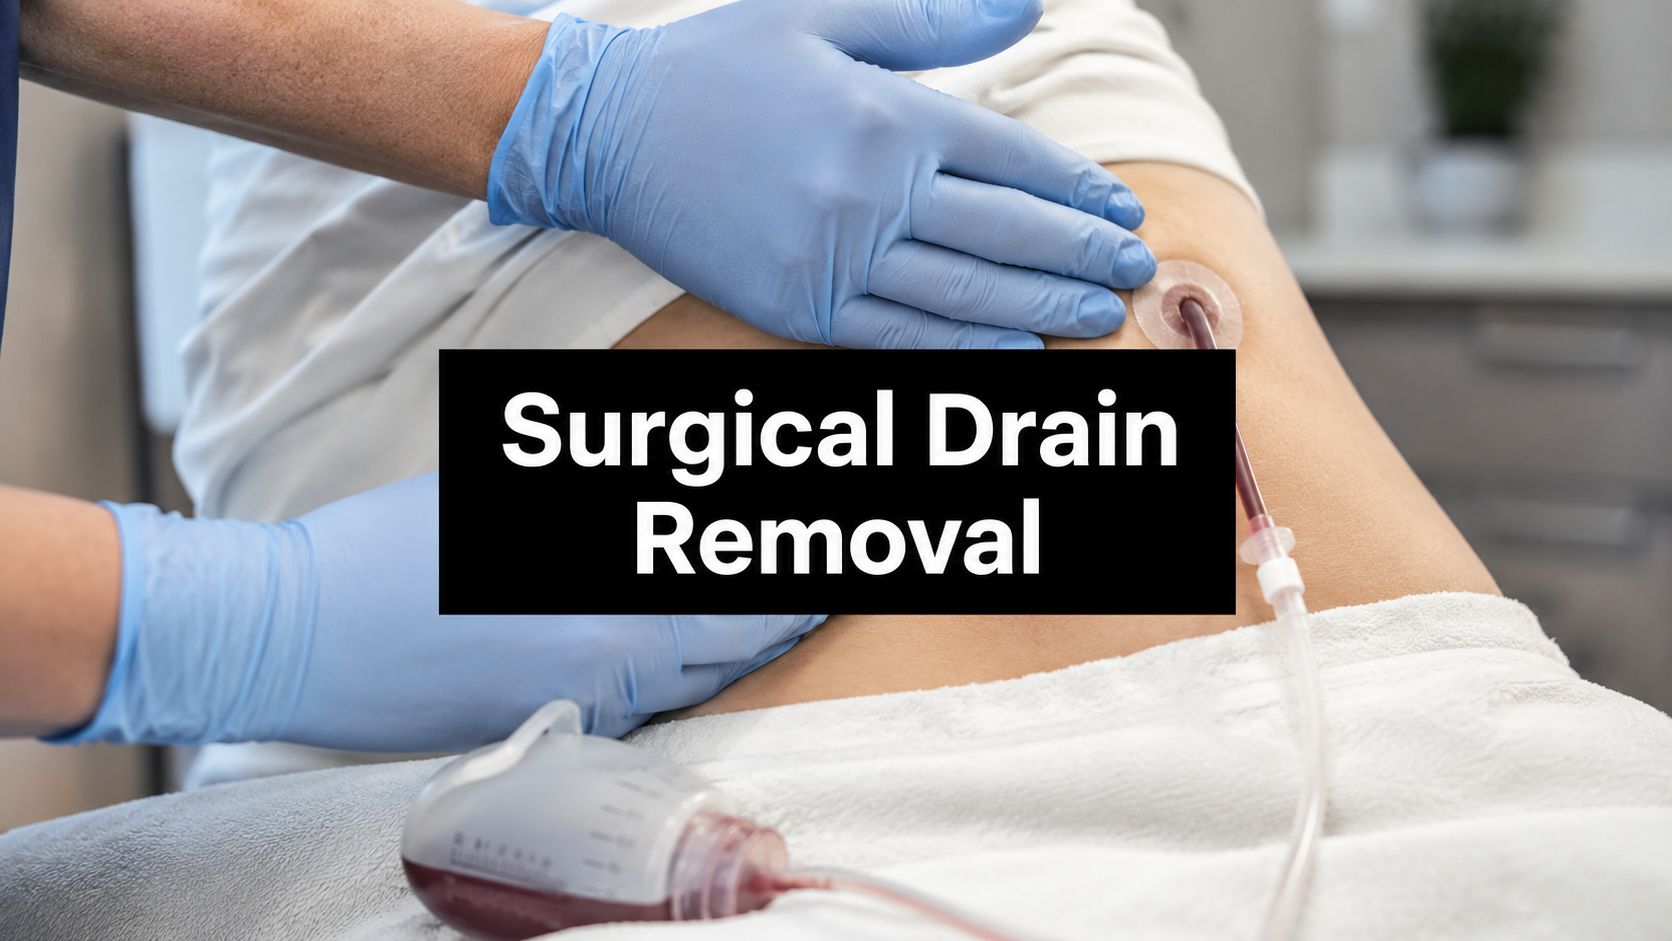
You're probably reading this with a drain bulb clipped to your clothes, a measuring cup on the counter, and one question repeating in your head, when can this thing come out? That feeling is completely normal. Surgical drain removal is usually a simple milestone in recovery, and at Cape Cod Plastic Surgery we treat it that way, with clear instructions, careful checks, and a calm hand from start to finish.

Living with a drain can make even a routine morning feel complicated. You're checking the bulb, wondering if the color looks right, and trying not to tug the tubing when you get dressed or sleep. That's exactly why drains are placed in the first place. They help prevent fluid from collecting under the skin, which lowers the chance of a seroma and supports smoother healing after procedures like breast surgery, tummy tuck recovery, or reconstructive surgery.
At Cape Cod Plastic Surgery, the goal isn't to make you memorize medical jargon. It's to help you understand what your body is doing and what our team is looking for before the drain comes out. A drain is temporary, but it plays an important role in protecting the final result while tissues settle and close.
If you're also trying to manage soreness or sleep position at home, our pain management after surgery guide can help you make the early days a little easier. For broader recovery habits, the tips for post-surgery rehabilitation resource is a useful companion, especially if you're trying to stay consistent with rest, walking, and wound care.
One patient may have one drain after a straightforward procedure, while another may have several days of output that gradually slows. The pattern matters more than the calendar. That's why the removal visit feels like a checkpoint, not a guess.
A surgical drain is a closed-suction system. In plain language, it is a thin tube connected to a bulb that gently pulls fluid away from the surgical site so it does not collect under the skin. Once you are home, your job is to keep it working, keep the site clean, and keep track of what it is producing.

Empty the bulb before it gets too full, then measure the fluid in milliliters and write it down right away. The number matters, but the pattern matters too. Drain output that steadily decreases is what we want to see, along with fluid that becomes lighter over time instead of staying bright red or turning cloudy.
Practical rule: if the tubing seems blocked or the bulb does not hold suction, do not assume the drain is done. A clog can make the output look falsely low.
A few care habits make a real difference. Wash your hands first, because clean hands lower the chance of contaminating the drain site when you empty it. Squeeze the bulb fully after emptying so suction is restored, which keeps fluid moving out. Strip the tubing if you have been shown how, since that can help move small clots or thick fluid through the line. Secure the drain to clothing or a support garment to prevent pulling, discomfort, and accidental tugging at the exit site. Keep a simple log with the date, time, amount, and color, because those details matter more than trying to remember them later.
If you want a separate refresher on protecting skin openings and keeping the area clean, our how to care for surgical incisions page fits well with the drain routine. The same basic mindset applies, keep the area clean, watch for change, and call if something looks off.
Early on, fluid is often reddish. As healing progresses, it should lighten and become more like pink, straw-colored, or clear fluid. If drainage suddenly increases or changes to bright red, green-yellow, or foul-smelling fluid, contact the surgeon, because those are not changes to ignore.
The old habit was to wait for a fixed number of days. A better approach is to base the decision on output trend, fluid quality, and the operation you had. In practice, that means we look for drainage that has fallen to about 30 to 50 mL per 24 hours and has become clear, because criteria-based removal can be safe and is linked with fewer wound problems in many settings review of drain removal evidence.
A breast reconstruction patient, a neck dissection patient, and an abdominal wall reconstruction patient do not always heal on the same timeline. Some procedures can tolerate earlier removal better than others. In one randomized trial after selective lateral neck dissection, removing drains at 100 mL per 24 hours instead of 30 mL shortened drain duration by 1.90 days and hospital stay by 1.87 days, without more complications or seroma JAMA Otolaryngology trial. The practical point is simple, the right threshold depends on the operation and the overall clinical picture.
For some low-risk patients after pancreatic surgery, early removal by postoperative day 3 was associated with fewer fistulas and shorter stays, which shows how strongly timing depends on context review of drain removal evidence. In abdominal and hepatobiliary surgery, output under 50 mL/day without bleeding or leakage has also been associated with lower surgical site infection rates review of drain removal evidence.
We do not look at one number in isolation. We look at the trend, the appearance of the fluid, the incision, the drainage site, and how you are doing overall. A drain that looks quiet because it is clogged is a different problem from a drain that is ready to come out.
Good output matters, but so does honesty about the tubing. A “low” drain that is not working right can delay recovery instead of helping it.
That is why the decision is medical, not just mathematical. A patient who is healing well may be ready earlier than expected, while another patient may need a little more time even if the output seems close to the target.
The appointment is usually simpler than people expect. You come in, go to a treatment room, and our team checks the drain site first. We look for calm skin, normal healing, and any sign that would make us pause before removal. If a retaining stitch is holding the drain in place, that comes out first. That is often the part patients notice most, because it feels quick and a little mechanical.
After that, the drain is removed with steady, gentle pressure. Most patients describe it as a brief pulling or sliding sensation rather than lasting pain. The tube comes out in one smooth motion, and the whole visit is over quickly.
You may be asked to take a slow breath while the drain is removed. That small pause helps you stay relaxed and keeps the surrounding muscles from tightening. Once the tube is out, many patients feel immediate relief, not because healing is complete, but because one more part of recovery is finished.
We follow a clear sequence. We inspect the site, remove the stitch if one is present, withdraw the drain, and place a dry sterile dressing right away removal protocol and outcomes. That order gives the team a chance to spot a problem before the tube comes out and helps protect the opening once the drain is gone.
The dressing is small and stays over the site when you leave. Before you go, you get plain instructions on keeping the area clean and dry, along with what to watch for later that day and the next. In certain breast reconstruction patients, early removal based on clinical signs rather than waiting for extremely low output did not raise complication rates, which is why we do not rely on a single number alone removal protocol and outcomes.
At Cape Cod Plastic Surgery, we keep this visit focused and calm. You know what we are doing, what it should feel like, and what happens next before you leave the room. For patients who want a broader sense of how follow-up skin care works after a procedure, our suture removal timeline page is a helpful reference.
The small opening where the drain exited usually closes on its own with simple care. For the first day or two, keep the site clean and dry, and expect only mild tenderness. A small amount of clear or lightly pink fluid on the gauze can happen, but it should not become heavy or increase over time.

Keep the dressing clean. Change it if your team tells you to, or sooner if it becomes damp. Once you have been cleared to wash, gentle soap and water around the area is usually enough, but avoid soaking the site until the opening has sealed.
Protecting the opening and limiting friction are the main goals during this phase. Baths, swimming, and hot tubs should wait until the skin is fully closed, unless your surgeon gives you different instructions. If you want a broader sense of how skin healing is often timed after a procedure, our suture removal timeline page is a helpful reference.
Call the surgeon if you notice any of the following:
If something feels wrong, call. I'd rather hear from you early than have you worry at home with a problem that should've been checked.
Minor tenderness is common. What we do not want is a changing picture, especially more redness, more swelling, or fluid that looks or smells different from the usual healing pattern.
Is surgical drain removal painful? Usually, no. Patients describe a quick tug or sliding sensation, and the whole process is over fast. Anxiety tends to be worse than the removal itself.
What is a seroma? A seroma is a pocket of fluid that can collect under the skin after surgery. Drains are used to reduce that risk while the tissues settle, and the possibility of a small seroma doesn't automatically mean something has gone wrong.
How long after drain removal can I get back to normal activities? That depends on the procedure and your incision healing, but the drain coming out doesn't mean full activity is back immediately. Light movement is usually part of recovery, while harder exercise often waits for the surgeon's clearance.
Is the process different for a tummy tuck versus breast surgery? The basic removal steps are similar, but the threshold for removal and the timing can differ by procedure. Some surgeries are better served by output-based criteria, while others may allow earlier removal if the rest of the exam looks reassuring.
What if the drain output looks low but the tubing seems blocked? That needs attention. A clogged line can hide fluid and make the output look safer than it is, which is why the tube's function matters as much as the number in the log.
If you're getting close to removal or you're unsure whether the drain is behaving normally, contact Cape Cod Plastic Surgery and ask for a check. A brief review can turn a stressful guess into a clear plan, and that's exactly what recovery should feel like.
A CTA for Cape Cod Plastic Surgery.
October 7, 2026
A Practical Guide to Healing After Breast Surgery

October 6, 2026
Your Safety Guide: What to Look for When Choosing a Plastic Surgeon
October 5, 2026
Why Our On-Site Accredited Facility Matters for Your Safety

Cape Cod Plastic Surgery offers expert cosmetic and reconstructive procedures in a safe, accredited setting. Led by Dr. Marc Fater, we combine advanced techniques with personalized care to help you look and feel your best.
Monday: 9:00 AM – 5:00 PM
Tuesday: 9:00 AM – 5:00 PM
Wednesday: 9:00 AM – 5:00 PM
Thursday: 9:00 AM – 5:00 PM
Friday: 9:00 AM – 5:00 PM